Press

Lauren Nicole Designs Featured as Houzz’s Room Of the Day

A NORTH CAROLINA INTERIOR DESIGNER CREATES A LIGHT, BRIGHT, COMFY SPACE FOR HER FAMILY AND ITS 5 PETS.

“The first time my family looked at this house, we breezed right through the first floor out to the backyard, which is a little slice of heaven,” interior designer Lauren Clement says. At the time of the tour, the interiors of the house were not so heavenly. The family room was darkened by paint, heavy furnishings and wood blinds — but the family snapped up the home anyway. “I knew it was an easy fix and all just cosmetic,” Clement says. She redecorated the room, which is now a light, bright family gathering space that looks out over the lovely backyard.

Family Room at a Glance What happens here: Interior designer Lauren Clement, her husband, Chris, and their daughters, Finley, 6, and Campbell, 5, enjoy playing games, showering their two rescue cats and three rescue dogs with attention, visiting, eating, drinking, watching TV and lounging. Location: Charlotte, North Carolina Size: About 300 square feet (27.9 square meters) Designer: Lauren Clement

The first step was choosing a wall color. Clement chose a very light gray that works with all sorts of color schemes, which was perfect for her, because she likes to change out pillows and accessories with the seasons. She also painted the fireplace bricks white and replaced the mantel. Next came the fabric for the spindle chair. “I knew it was a really fun pattern I could pull lots of colors from,” she says. She chose light neutral tones for the sectional sofa and the rug, then layered in bright, preppy color via artwork and pillows.Wall color: Wickham Gray, Benjamin Moore; sofa, rug, lighting, accessories, fabrics: available via Lauren Nicole Designs

Check out the full feature here!

Press

Houzz Celebrates Mother-Daughter Design Duos

I hope all you hard-working mommas had a fabulous Mother’s Day! I am such a lucky woman to be able to work side-by-side with my mom on a daily basis, in a career field we are both so passionate about. My mom inspires me and challenges me in so many different ways. I wouldn’t be where I am today — professionally or personally — if it wasn’t for her.

In celebration of Mother’s Day, our friends at Houzz published a series on mother-daughter duos in the design world. Click here to read the full article and get a glimpse on how we work together to make home a very special place.

Then visit my complete Houzz profile to view some of the favorite projects mom and I have worked on together over the years!

Color

Greenery – The Pantone Color Of The Year

The 2017 Pantone Color of the Year is Greenery, and no season is more representative of the color green than spring.  Greenery is inspired by nature and the trend is all about brining the outdoors in, adding a burst of freshness to your home decor.  Here are some of my favorite ways to incorporate the Greenery trend throughout the house:

The first (and probably most obvious) suggestion is to get your greenery through house plants.  These can be real or, for those of us who do not have green thumbs, faux.  But if you’re going to use faux, it’s very important that you don’t skimp on price and quality.  You don’t want the stems to have an obviously plastic look to them, and you don’t want the leaves to become dust collectors.  Remember to keep your plants on lower surfaces where you can actually see them — the coffee table, kitchen island or dining table. Don’t shove them on top of cabinets or in a high shelf.

Another green alternative to traditional house plants are boxwoods.  Anyone who follows me knows I am a huge lover of boxwoods.  They are available in so many shapes and sizes too — potted, wreaths, and even in ball form to use as filler in bowls or on trays.  I prefer working with preserved boxwoods, as opposed to live boxwoods, because there is less maintenance.  I do, however, have a secret tip for getting the most out of your boxwoods.  Every month or two, spritz your boxwoods with a mixture of water and green food coloring to maintaining the rich green hue, keep them hydrated and keep the dust off.

If plants and flowers aren’t your style, you can opt to get your pops of green through fabric instead.  This can include upholstery, pillows or other accent pieces like chairs and ottomans.  What’s great about Greenery is that is pairs well with so many other colors that you may already have in your palette — navy, coral, gray, tan, purple, you name it!

Accessories are another easy and fun way to play with color.  For example, you could showcase some green bottles made from recycled glass.  These look great empty on an end table, or you can fill with some simple branches or cotton stems for your mantle or fireplace.

Greenery really is a versatile color and trend, so take time to experiment with different ideas and find what works best for you.  But if you need a little bit more help, feel free to send me an email or stop by the Lauren Nicole Home store in Toringdon Circle Shopping Center.

Click here to watch my WBTV Morning Break segment on Greenery!

Design Tips

Incorporating Artwork Into Your Home Decor

Spring is known as a season of renewal and rebirth, which is why it can be a perfect time of the year for reorganizing or redecorating at home. As you go through your spring cleaning rituals, it can be fun to rearrange — or rediscover — some of the artwork you’ve collected throughout the years.

Art is very much a combination of personal taste and design, so it’s difficult to give specific instructions on how you should incorporate it into your home. But I can offer a few tips for you to keep in mind when selecting and displaying those pieces of art.

First, don’t try to do too much in your space. Select one or two pieces of art that can serve as an inspiration point or focal point for your overall room design. If you have multiple pieces on multiple walls, they start competing against each other and can become distracting. You want your artwork to reflect and compliment the feeling and the colors used in the room, not work against them.

Also consider the space you have to work within. A good rule of thumb is to fill two thirds to three quarters of the space you have available. When it comes to artwork or wall decor, bigger is always better. Be sure you’re selecting pieces that are the correct size!

Now that you’ve got your pieces selected, it’s time to hang them! Always hang artwork with the center at eye level.

“My personal rule of thumb is positioning the item four to six inches up from the piece of furniture it is hanging above.”

If you don’t want to use one large piece of art, consider creating a gallery wall of smaller prints grouped together to take the place of one large item. Just make sure the frames have a consistency to them, and that the combination of prints fill the same amount of space that one large piece would.

Finally, the only real rule in collecting and displaying art is that there are no hard and fast rules. Buy what you love, what makes you happy when you look at it, and what reflects the design of your space.

If you need help shopping for or selecting artwork for you home, please don’t hesitate to reach out to me for assistance! Send me an e-mail, message me on Houzz or stop by our studio in Toringdon Circle Shopping Center.

Design Tips

How To Make Any Bathroom Feel More Luxurious

In normal day-to-day life, conversations about the bathroom are often considered taboo, but in the design world it’s one of my absolute favorite topics!

The bathroom is typically where you first start your day after crawling out of bed, and where you last end your day before slipping back beneath the sheets. It is a space to renew for the day ahead, and wind down from the stresses of everyday life. And for those with families or roommates, it’s often one of the only rooms in the house where you can truly get alone time.

This is why it’s important to make sure your bathroom is a calming, welcoming and relaxing space. There are several ways to update your bathroom to get the same luxurious atmosphere you get when staying in a hotel or visiting the spa.

Bathrooms aren’t like other rooms in your house, where you can rearrange the furniture to suit your mood and needs. In addition, the materials used in bathrooms are mostly smooth surfaces. Because of these somewhat fixed design elements, your attention to detail has to be very strategic in using a mix of visual textures.

The first step – and also easiest – is to invest in the fluffiest white towels you can find. Some of the materials I recommend are bamboo, Egyptian cotton or Pima cotton. They will give you the most luxurious feel and also be the longest lasting in terms of wear and tear. The color white is classic and will provide a crisp, clean look to tie the room together.

In order to maintain serenity in your bathrooms, it’s important to keep clutter to a minimum. I know, I know — this is easier said than done! But it’s also important to make sure that you’re not just knocking everything off the counter into a drawer. Invest in some baskets or other organizational dividers so everything has a proper place. This will help eliminate stress in the morning and save time from hunting for that certain lipstick or perfume. But clutter doesn’t just pertain to your makeup, toothpaste and lotions. You don’t want to go overboard with flowers, candles or decorative soaps on your countertops either.

One area of the bathroom that often gets overlooked, but plays a key role, is proper lighting. There are four different purposes to consider when choosing bathroom lighting. First, you’ll want general overhead lighting. Second, there should be additional vanity lighting for applying makeup and styling hair. A third option is to bring in mood or ambient lighting — like with a dimmer — for when you’re soaking in a relaxing bath. Finally, you could install some statement lighting, like a chandelier or sconces.

Additional upgrades to enhance your bathroom experience could include installation of massaging shower heads, a steam shower, or heated floors. You also could change out the mirrors to feature ones with a unique shape or frame.

But luxury doesn’t need to be relegated to just your master or main bath. I’ve included images below of two powder rooms that also exude elegance. In the first, the accessories — tall formal mirror, oil painting and chandelier — all elevate this smaller space into a room that will make guests feel pampered, even for the short time that they are there.

This second powder room showcases a more casual luxury by using the status look of the navy grasscloth, even onto the ceiling. Side sconces are used here again, and of course the design is topped off with an amazing mirror and chandelier.

Color

Three Major Ways To Bring Color Into Your Home

Spring is right around the corner – or judging by this week’s weather in Charlotte, it’s already here – and nothing highlights the start of the new season like the re-emergence of bright colors! Just like handbags and heels do for your outfit, a pop of color in your home can completely transform the look and feel of the space. There are several changes you can make that are both relatively simple and affordable to brighten up different rooms in your home, but the three I’m going to touch on in this post are Paint, Artwork and Accessories.

Paint: Painting is one of the quickest ways to bring color into your space, and also one of the most versatile. The first option to add some personality to the room is by painting an accent wall. But just remember to only color one wall and not two. If you paint two walls it will divide the room in half and make it feel not only disjointed, but smaller. If an entire wall is too much for you, try painting just the inside of your bookshelves. This will highlight anything you have on the shelves in terms of accessories and help those pieces stand out. Finally, you could paint a piece of furniture – maybe a coffee table or trunk – to provide an unexpected pop of color.

Similarly, you could reupholster the fabric of a chair or couch to get the same kind of affect with those pieces.

Artwork: Colorful artwork can serve as a major focal point in your space. But remember to go bigger than you think you need with your artwork. Use one large piece, or group together several small and medium pieces. An alternative to individual pieces of art is to cover your whole wall in art — yes, I’m referring to wallpaper! Wallpaper is back in a big way. You can cover an entire room, do an accent wall, or for a really dramatic and unique look, consider wallpapering your ceiling.

Accessories: Swapping out accessories is the easiest and quickest way to bring a change of color into your home, and it can be done several times throughout the year to compliment the seasons. Pillows are one of my favorite examples. They are so easy to switch out and can add a serious pop of color to a neutral couch or bedspread. They come in velvet, florals, solids, embroidered…the possibilities with pillows are endless! You also can place a colorful throw over the sofa or at the end of the bed (it still gets chilly at night!). Another great option is to bring in fresh flowers or greenery to brighten up your mantle or coffee table, and then try playing with different pieces like vases, bowls or trays. You could even add some funky lamps to your end tables to truly brighten up the room. (Sorry, couldn’t resist the pun!).

Hopefully you’ve been inspired by these tips, but please be sure not to try them all out in one room! Take different ideas into the different spaces of your home – from office to bathroom to family room to kitchen – as a boost to not only your style but your mood.

Design Tips

Spring Is In The Air! Time To Update Your Outdoor Living Space

It’s early February and we’ve already been able to enjoy several 60+ degree, spring-like days here in Charlotte, NC. I love getting out and enjoying the sunshine on these first few warm days after being cooped up indoors most of December and January. Something else that’s been hibernating this winter? My patio furniture and decor! It’s officially time to unpack the cushions and umbrellas and get that outdoor living space ready for spring.

Click here to watch & learn more on this topic from my WBTV segment!

It’s never too early to start planning, even if you live in the Northeast or Midwest where the threat of snow is still very real. The design process alone is a sure-fire mood booster to get you excited for warmer days ahead!

Maybe you’re doing a makeover to a patio space you already have, or perhaps you’re planning an entirely new outdoor space. (If so, see my previous blog post with tips for home renovations!) But no matter the size of the project or the space, you need to consider function first.

Outdoor living spaces are typically divided up into three general functions: relaxing, entertaining and playing.

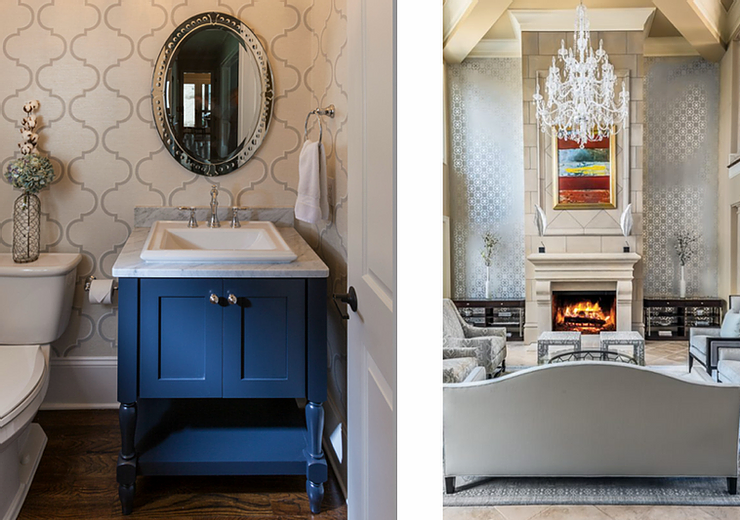
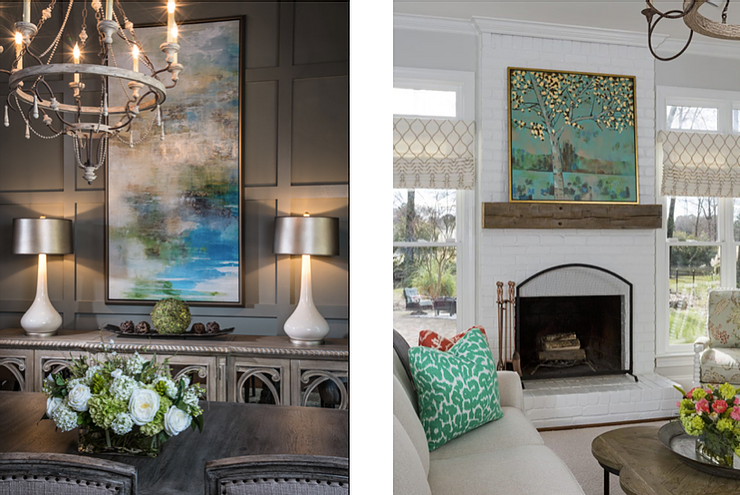
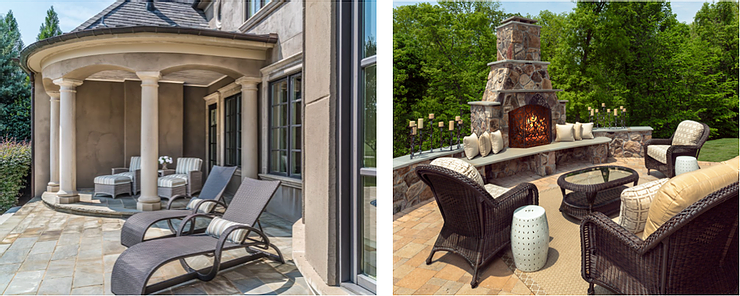
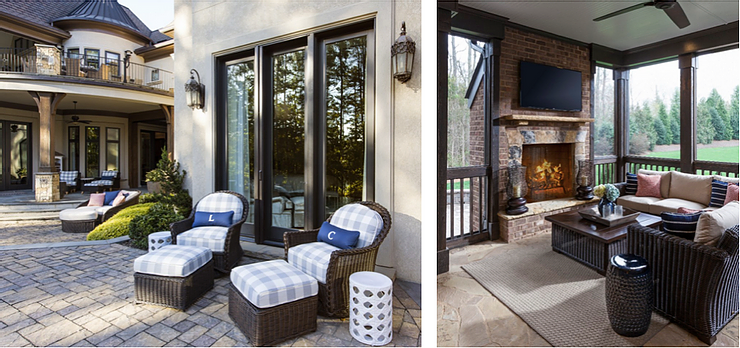
Relaxing: Your outdoor space can become your sanctuary – a place where you can escape. Spaces to relax may include lounge chairs for sunbathing and napping poolside, or a fireplace or fire pit to cozy up next to and enjoy a glass of wine after a long day. But if tranquility is your main goal, be sure to also consider privacy. Are there a lot of open spaces where neighbors can see into your yard? Consider adding some tall plants or investing in a decorative room divider to create more of a barrier for yourself.

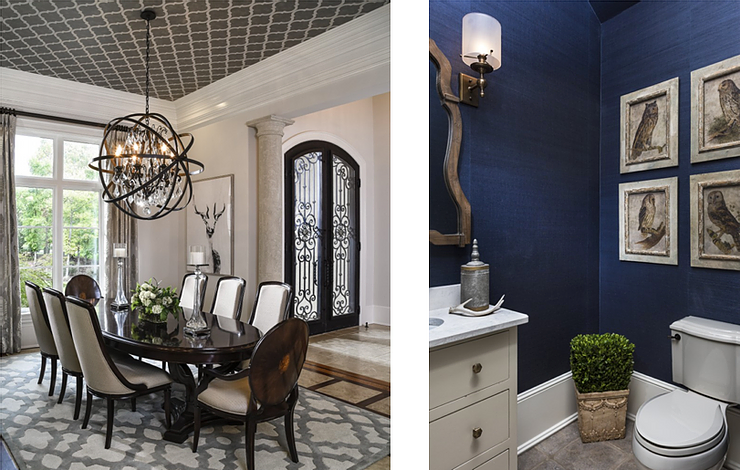
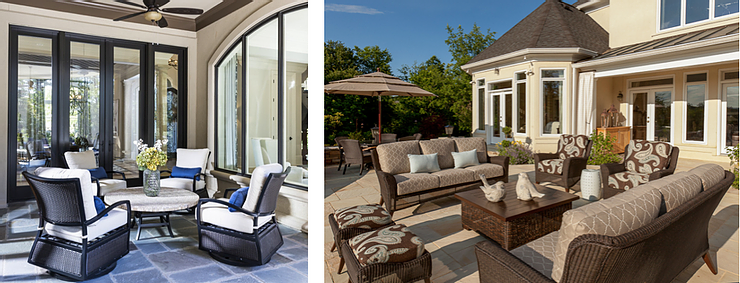
Entertaining: Do you love to host parties and get-togethers with your family and friends? First, designate a space for grilling and barbecuing. This could be a small corner for just a grill, or a large space with an entire outdoor kitchen and bar. Just make sure that the food prep area isn’t too far removed from the main patio space – you don’t want your grillmaster to get lonely or feel like they are on the outside looking in. Second, seating is key when entertaining so make sure you designate a space for eating. Depending on the amount of space you have to work with, this could be anything from a small bistro table to a pub table to a more traditional dining table and chairs. Finally, be sure to consider the sun and where it hits your outdoor space throughout the day. You may need to add a table umbrella or an awning.

Playing: Whether your play space is for pets, little kids or the kid at heart, the key is to keep these areas a little further away from your relaxing and entertaining spaces. Guests shouldn’t have to worry about getting hit in the head by a frisbee or tripping over a corn hole board. You can add a swing set or other play place for the young children, while keeping a grassy area free for sports and lawn games for teens and adults.

Once you have your basic functionality plan down, you can turn your focus to adding furniture and accessories.

“My biggest tip here is NOT to skimp on inexpensive patio furniture. If you do, you will end up needing to replace it over and over again.”

This furniture is exposed to all of the elements, and you want something that will stand the test of time. I recommend using Sunbrella fabrics for your cushions and pillows, and also consider investing in furniture covers for the winter months – so worth it!

An outdoor rug is a great way to add color, comfort and personality to your space. But be sure to choose your material wisely. A polypropylene or acrylic rug is lightweight, inexpensive, can get wet and dries easily. This won’t be as plush or soft as an indoor area rug, but it will be more durable. You could also try a bamboo or sisal rug. Just know that natural rugs can mildew if exposed to too much moisture.

Finally it’s time to put the icing on the cake – accessories! I love outdoor lanterns for mood lighting or as a creative way to hide a citronella candle. A well-placed garden stool can function as an end table for your lounge chairs while adding a pop of color at the same time. And of course flowers that will go from spring through fall will provide an amazing backdrop to it all.

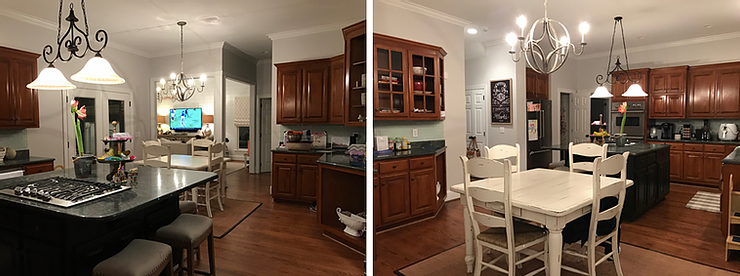
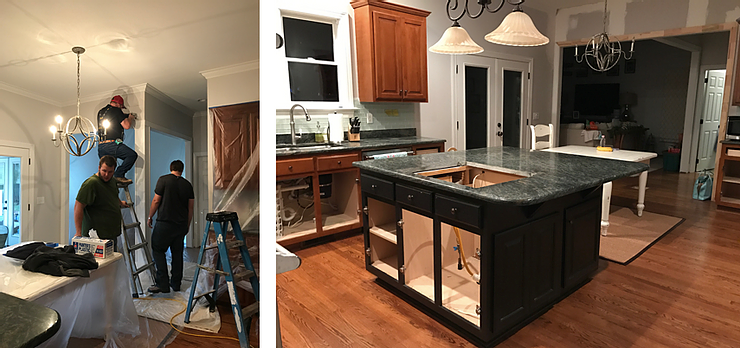
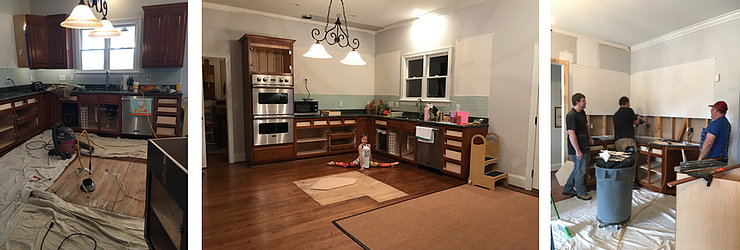
Okay, I think it’s time I go escape to my backyard oasis to get some reprieve from all this construction in my kitchen. Hopefully you can find time to enjoy this amazing weather as well!

Before and After

Tips For Planning A Home Renovation

We are over three weeks into the New Year, which means I am three weeks into my kitchen renovation – eek! But the process of planning this renovation goes back much farther than just three weeks. There are so many important steps to take before the demolition begins to ensure a successful and (mostly) stress-free renovation. Below are my top tips for getting your renovation plan off to a fantastic start.

Here is an example of what our kitchen looked like before starting renovation work.

Do your homework: Before any checks are written and any sledgehammers are thrown, make sure you spend some time on design websites browsing and collecting inspiration pictures. You may not like everything that you’re finding on Pinterest and Houzz, but you can pull together color palettes and furniture that you like so you’re customizing the project and not just replicating something else. Don’t spend hours on hours on hours on this process though, or you will just end up confusing yourself. Also keep in mind that this part of the process isn’t all about the visuals – it’s just as important to consider how you want your new space to function too.

Set a realistic budget: Unfortunately a lot of renovation and design decisions come down to money. It’s so important that you set realistic budget expectations and leave yourself some contingency money. I know you’ve all seen the HGTV shows where the homeowners hit a $3,000 setback to rewire an electrical panel they don’t discover is busted until halfway through the renovation. I also suggest keeping the contingency fund as a range instead of a hard number so you don’t feel locked in if something like that does happen and you need to go over budget. And be sure to remember that the budget doesn’t just include the renovation – you’re going to need furniture and accessories to complete the project!

Be reasonable about the timeline: Those same unexpected hiccups that will mess with your budget also will mess with your project’s timeline. You don’t just want to get the job done, you want to make sure the job is done right, so stay flexible with the completion date. Expect delays of anywhere from two days to two weeks, depending on the size and scope of your project. Just take a deep breathe, be patient and don’t rush the renovation!

One of our top needs was to improve the functionality of our space, and removing this extra beam made a big difference

Determine if you are hiring a general contractor: You can choose to manage a renovation project on your own, or you can hire a general contractor to oversee everything. Just like we discussed in regard to budget and timeline, there is always something that pops up and if you don’t handle it correctly – the way a good general contractor would – you end up spinning your wheels and unnecessarily dragging out a project. The money paid to a general contractor is essentially your insurance policy, money spent on somebody managing your project to make sure it all goes smoothly.

Get 2-3 estimates: It is so important to comparison shop to ensure you are getting not only a fair price, but also the best team of people for your project. Make sure that you are comparing apples to apples though, because every company is different as far as what their packages do and don’t include. It’s really important to make sure that every bid you’re looking at means the same thing. And remember that these people are going to be in and out of your house and you’re going to have to communicate with them a lot throughout the process. You want to make sure that not only is your decision based off the estimate, but how well you feel you can work together throughout the project.

Working our way down to a blank slate!

Hopefully with this information in your back pocket, you can begin planning your home renovation project with confidence! Just remember that no matter how prepared you are, something unexpected will happen. But trust in the process and remember that being happy with the end result is really all that matters.

Stay tuned to the blog for a more complete overview of my personal kitchen renovation!

How to

How To Refresh Your Home Decor After The Holidays

Now that the ball has officially dropped on a New Year, it’s time to sweep up the confetti and pack away the holiday decorations until next season. All the pinecones, holly wreaths, stockings and bows bring a special joy and excitement to your home in December, which can leave your space feeling empty or bare after cleaning up from the holidays.

But, this also is a great opportunity to make small changes with your current home decor for a fresh look in the New Year, so try not to put your everyday accessories back in the same place.

As you take down your holiday decorations, consider these four easy updates:

1) Fresh Touches: Consider adding gorgeous faux florals and greenery in place of your holiday decor. On my foyer table over the holidays, I usually have it filled with a beautiful holiday centerpiece. But, once the holidays are over, I like to replace it with one of my favorite tall faux florals — a beautiful orchid arrangement. Another idea is using boxwood or cotton balls and placing those in the bowls that you used to showcase ornaments or pinecones.

2) Swap Out Artwork: Since you’re already moving holiday decor and wreaths around and back up to the attic, use this as a chance to swap out some artwork. Changing your artwork in your main living areas can make a huge impact and breathe life into your space. This can include paintings, family photographs or mirrors. Play around with your collection and have fun mixing-and-matching new combinations!

3) Make Over Your Mantel: The great thing about post-holiday cleanup is that you’re usually left with a blank slate, and that’s how it is for my mantel. I love to be creative and instead of putting holiday garland on my mantel, I’ll place cotton stems or greenery around the base of my wire-vases. But be sure to add color and freshness, because that’s probably what you’re craving after the holidays.


4) Your Front Door: I’m all about featuring a wreath year-round! Swap out your holiday wreath for a cotton wreath. Have you sensed a theme here? Cotton is a gorgeous staple in my home, suitable for any season!

These small adjustments should be just enough to reinvigorate your home for the New Year. But if you’re still craving change, maybe it’s time to think about a bigger home project for 2017. I am excited to announce that at my home we will finally begin tackling the kitchen renovation this month! Stay tuned to the blog for updates!

Press

Holiday Seasonal Scape Challenge

It’s the first week of December and the Holidays are HERE! One of my favorite holiday activities? Decking the halls for clients and with my family in our home. I have a very exciting contest and giveaway for you today that involves the holidays!

INTRODUCING THE HOLIDAY SEASONAL SCAPE CHALLENGE!

We’re spreading the Holiday Cheer and want to see your holiday scapes. Whether that’s your mantels, coffee tables, foyers, porches, or whatever you consider your favorite holiday spot in your home! Share with us and you can win something FAB.

We’re feeling festive and there is no quicker way to make your home feel like the holidays than a holiday-scented candle. We will be giving away one of these 2 candles from Graybill & Downs! A $45.00 value, 65 hour burn time, amazing scents…these have quickly become our favorite!

HOW CAN YOU ENTER TO WIN THIS CANDLE? IT’S EASY!

  1. Head on over to instagram and follow @laurennicoledesigns and all the hosts! Click this link to our instagram post for easy following.

  2. Most important part: Share your Seasonal Scape! Simply use the hashtag #SeasonalScapeChallenge

  3. The contest starts Tuesday at noon and ends Friday at 8am. We will contact the winner Friday!

Design Tips

How to Make Your Home Both Beautiful and Functional

Guess what? You don’t have to choose between a beautiful home and a functional home! You can have both of them. It’s completely possible to have a practical home that is also gorgeous.

Creating a family-friendly home with style and functionality is my main objective when I design for my clients and for my family too! I’m telling you how to accomplish this on a recent Houzz article…check it out!

CLICK HERE to read all about it!

Press

Fall Seasonal Scape Challenge + A GIVEAWAY

Hey y’all and HAPPY FALL! Autumn is officially here in Charlotte with a slight nip in the air, pumpkins galore at the grocery store, Fall wreaths on the door, and I don’t look like a crazy person wearing boots and a scarf outside. 🙂

With every new season, that means it’s time for another Seasonal Scape Challenge! I’ve teamed up with some of my favorite bloggers and instagrammers and each of us are sharing our favorite Fall Scape. Take a look below for all the pretty ‘scapes!

Let’s start with my scape. Last week we spent a day decorating my client’s home for Fall and because it’s so pretty: we decided to share their home as part of this challenge!

First stop? The mantel…

Isn’t this squirrel so cute? I already know a spot Mr. Squirrel would look perfect on my kitchen island. You can enter to win this squirrel ($100 value)! Here is what you do:

1. Post an image of your Fall or Halloween Scape on Instagram, it can be your mantel, foyer, coffee table, whatever your heart desires. Use the hashtag #SeasonalScapeChallenge

2. Follow each one of our hosts:

  • @laurennicoledesigns

  • @sarahsofiaproductions

  • @sarah_702parkproject

  • @brennadomesticcharm

  • @bluegraygal

  • @sarahsarna

  • @kristywharvey

  • @awelldressedlife

  • @blountdesigns

3. You have until Wednesday at noon to enter in! Have fun and good luck! 🙂